A Developer's Guide to QR Code Crypto Payments
A qr code crypto payment is surprisingly simple. It takes a long, complicated cryptocurrency wallet address and transaction details, then encodes all that information into a scannable image. When a customer scans the code with their crypto wallet app, it instantly fills in the recipient's address and, in most cases, the exact payment amount.
This completely sidesteps the nightmare of manually typing those long strings of characters, which is a recipe for costly mistakes. It's the little things like this that make crypto practical for real-world commerce.
How Crypto QR Codes Actually Work
At the end of the day, a QR code is just a visual way to hold text. For crypto payments, that text isn't just a random wallet address; it's structured according to specific standards that different wallets have agreed upon. You can think of these standards as a universal language for crypto transactions.
Without them, you'd have chaos. A QR code from one service wouldn't be readable by another, leading to a clunky and frustrating experience for everyone. These protocols are what make the whole process feel seamless to the person paying.
The Key Payment URI Standards
When you get down to the technical level, you'll constantly run into two major standards: BIP-21 for Bitcoin and EIP-681 for anything on Ethereum. They create a standardized format, known as a Uniform Resource Identifier (URI), that payment apps can instantly understand.
BIP-21 (Bitcoin): This is the go-to standard for Bitcoin payment requests. A simple BIP-21 URI might look like
bitcoin:1A1zP1eP5QGefi2DMPTfTL5SLmv7DivfNa. But you can also add parameters, like an amount (?amount=0.01) or a label (&label=MyStoreOrder), which tells the wallet exactly how much to send and what it's for.EIP-681 (Ethereum): This is the equivalent for the entire Ethereum ecosystem. An EIP-681 URI for a basic ETH payment looks something like
ethereum:0xfb6916095ca1df60bb79ce92ce3ea74c37c5d359. It’s incredibly flexible, allowing you to specify the amount, gas limit, and even trigger smart contract functions, which is essential for dApps.
Getting familiar with these formats is the first real step to creating reliable QR codes that just work for your users.
Key Takeaway: Standardized URIs like BIP-21 and EIP-681 are the bedrock of QR code crypto payments. They guarantee that when a customer scans your code, their wallet knows exactly what to do—no matter what app they're using.
Static vs. Dynamic QR Codes
Not all QR codes are the same. In the world of crypto payments, they generally fall into two buckets: static and dynamic. Picking the right one really boils down to what you're trying to accomplish.
A static QR code is the simplest version. It contains a fixed wallet address and nothing else. Once you generate it, it never changes. This is perfect for straightforward use cases, like a QR code on a tip jar or a personal donation page where the sender decides on the amount.
A dynamic QR code, on the other hand, is generated on-the-fly for every single transaction. It encodes the wallet address, the specific payment amount, and often a unique order ID. For any kind of e-commerce, this is the only way to go. It prevents customers from accidentally sending the wrong amount and makes it possible to automatically confirm and reconcile payments on your backend.
Here's a quick breakdown of how they stack up.
Static vs Dynamic Crypto QR Codes
| Feature | Static QR Code | Dynamic QR Code |
|---|---|---|
| Content | Fixed wallet address only. | Unique per transaction; includes address, amount, and order ID. |
| Reusability | Highly reusable. Print once, use forever. | Single-use. Expires after the transaction. |
| Amount | Payer must enter the amount manually. | Pre-filled for the payer. No manual entry needed. |
| Tracking | Difficult to track individual payments. | Easy to track and reconcile with specific orders. |
| Error Potential | Higher risk of payer sending the wrong amount. | Very low risk of payment errors. |
| Best For | Donations, personal payments, simple in-person tipping. | E-commerce, invoicing, point-of-sale systems, any automated checkout. |
In short, if you're running a business, you'll almost always need dynamic QR codes to keep your operations smooth and error-free.
The growth here is hard to ignore. Juniper Research estimates that the global value of QR code transactions will soar to $3 trillion in 2025, with over 2.2 billion people using them for payments. To capture a piece of that market, you have to nail the user experience. You can learn a ton from these Crypto UX best practices.
Generating QR Codes on the Client and Server
Once you've got the theory down, it's time to actually build something. A key decision you'll face is where to generate your crypto QR codes: should it happen on the user's device (client-side) or on your own infrastructure (server-side)? Each path has its own trade-offs, and the right choice really depends on what you're building—anything from a simple donation button to a full-blown e-commerce checkout.
Let's break down both methods so you can figure out what makes sense for your project.
Creating QR Codes in the Browser with JavaScript
For simple use cases, generating the QR code directly in the user's browser is often the fastest way to get up and running. This approach offloads all the processing work to the client, which means less strain on your server. It's a great fit for static websites or any scenario where you don't need to track the payment request on your backend before it's created.
The go-to method here involves using a lightweight JavaScript library. One of the most battle-tested options is qrcode, a library that can take any string—like our crypto payment URI—and render it as a scannable image right in the browser.
Imagine a user is on your checkout page, ready to pay 0.05 ETH. Your code would construct the EIP-681 URI and then feed it to the library, which instantly generates the QR code on the spot.
A quick look at its weekly downloads—over 4.5 million—tells you everything you need to know. It's a reliable and widely trusted tool in the developer community, making it a safe choice.
To get this working, you’d include the library in your project and then write a small script. The logic is straightforward: build the payment URI string, then call a function to render the QR code inside a specific HTML element, like a <canvas>.
// Example of client-side generation with qrcode.js
import QRCode from 'qrcode';
// 1. Construct the EIP-681 payment URI
const ethAddress = '0xfb6916095ca1df60bb79ce92ce3ea74c37c5d359';
const amount = '0.05'; // 0.05 ETH
const paymentUri = ethereum:${ethAddress}?value=${amount}e18; // value is in Wei (0.05 * 10^18)
// 2. Select the HTML element and generate the QR code
const canvasElement = document.getElementById('qrcode-canvas');
QRCode.toCanvas(canvasElement, paymentUri, function (error) {
if (error) console.error(error);
console.log('QR code successfully generated!');
});
While this is fast and efficient for one-off payments, it has its limits. If you're building a serious e-commerce platform, relying only on client-side generation will eventually cause headaches, especially around payment tracking and security.
Server-Side Generation for Robust Applications
For most business applications, server-side generation is the way to go. When you create a qr code crypto payment on your server, you gain a massive amount of control, better security, and the ability to manage the entire lifecycle of the transaction. This is non-negotiable for dynamic QR codes in an e-commerce setting.
Here's how it typically works: your server gets a request for a new order. It then generates a unique payment address, logs the transaction details in your database, and then creates the QR code. The final image is sent to the client's browser. This flow guarantees that every single payment request is tracked and validated before the user even lays eyes on the code.
Why Server-Side Wins for E-commerce: By generating QR codes on the server, you establish a single source of truth for every transaction. You can tie the order ID, the expected amount, and the unique crypto address together, which makes payment reconciliation and order fulfillment both automated and incredibly reliable.
You'll find excellent libraries for this in any popular back-end language. In Python, the qrcode library is a solid choice. For Node.js, you can use the very same qrcode package on the server to generate the image data.
Here’s a quick conceptual example of a Node.js API endpoint using Express that creates a Bitcoin QR code on demand:
// Example of a server-side API endpoint in Node.js
import express from 'express';
import QRCode from 'qrcode';
const app = express();
app.use(express.json());
app.post('/api/generate-payment-qr', async (req, res) => {
const { orderId, amount } = req.body;
// In a real app, you'd generate a unique address here
const btcAddress = '1A1zP1eP5QGefi2DMPTfTL5SLmv7DivfNa';
// Construct the BIP-21 URI
const paymentUri = bitcoin:${btcAddress}?amount=${amount}&label=Order_${orderId};
try {
// Generate the QR code as a Data URL
const qrCodeDataUrl = await QRCode.toDataURL(paymentUri);
res.json({ qrCodeUrl: qrCodeDataUrl });
} catch (err) {
console.error(err);
res.status(500).send('Error generating QR code');
}
});
app.listen(3000, () => console.log('Server running on port 3000'));
This endpoint returns a data URL, which you can plug directly into the src of an <img> tag on your checkout page. This server-first approach is the bedrock for building a scalable and secure crypto payment system.
For a deeper dive into how this works across different cryptocurrencies, our guide on coins and their QR code specifics offers more detailed examples.
Confirming Payments on the Blockchain
Getting a QR code on a customer's screen is just the first part of the puzzle. The real work begins the moment they scan it and hit "send." Your system needs to know, without a doubt, that the payment has landed, it's for the right amount, and it's securely locked into the blockchain. This confirmation process is the critical link that turns a scan into a successful order.
If you don’t have an automated way to confirm payments, you’re stuck manually refreshing a block explorer for every single order. That's not just tedious; it's completely unworkable for any real business. You need a system that listens for on-chain events and reacts to them instantly.
Webhooks vs. Polling for Transaction Status
When it comes to watching for incoming funds, you really have two paths you can take: webhooks or polling.
- Polling: This is the needy approach. Your server constantly pings a blockchain node or an API, asking, "Is it there yet? Is it there yet?" every few seconds. It’s fairly simple to set up, but it's incredibly inefficient. You create a ton of useless network traffic and risk annoying delays if your polling interval is too long.
- Webhooks (Callbacks): This is the smart, efficient method. Instead of your server doing the asking, you tell a service to give you a shout when the payment arrives. You provide a callback URL, and the instant the transaction is detected, that service sends a notification with all the juicy details right to your server.
Why Webhooks are Superior: For anything that needs to happen in real time, like an e-commerce checkout, webhooks are the undisputed champion. They’re event-driven, meaning you get instant updates without wasting server resources on constant checks. This translates to a faster, smoother experience for your customer and a much happier backend system.
With a webhook in place, you can instantly flip an order status from "pending" to "paid," kick off the shipping process, or unlock digital content the moment a payment is confirmed. For a deeper look into the mechanics, especially on networks like Ethereum, it's worth understanding the role of Ethereum transaction management smart contracts.
The move toward QR code payments is more than just a trend; it's a global shift. Projections show that by 2025, over 2.9 billion people will be using QR codes for their transactions. This isn’t surprising when you consider that in 2023, 80% of smartphone users had scanned at least one QR code in the past year. With the QR code payment market expected to blow past $35 billion by 2030, a rock-solid confirmation system isn't just nice to have—it's essential.
Waiting for Sufficient Confirmations
Just because a transaction appears on the network doesn't mean it's set in stone. Blockchains aren't instantaneous. A new transaction first sits in a "pending" state before a miner bundles it into a block. Even then, there's a tiny—but real—chance of a "chain reorganization" that could effectively erase it.
To guard against this and prevent double-spending attacks, you need to wait for confirmations. One confirmation happens every time a new block is built on top of the block containing your transaction.
- Bitcoin (BTC): For most day-to-day sales, 2-3 confirmations are considered a safe bet.
- Ethereum (ETH): A more common standard here is waiting for 12-15 confirmations.
Deciding how many confirmations to wait for is always a balancing act between speed and security. The more valuable the transaction, the longer you should wait. You can get a more detailed breakdown of how this all works in our guide on crypto transaction tracking.
This diagram helps visualize the difference between generating a crypto QR code on the client's device versus on your server.
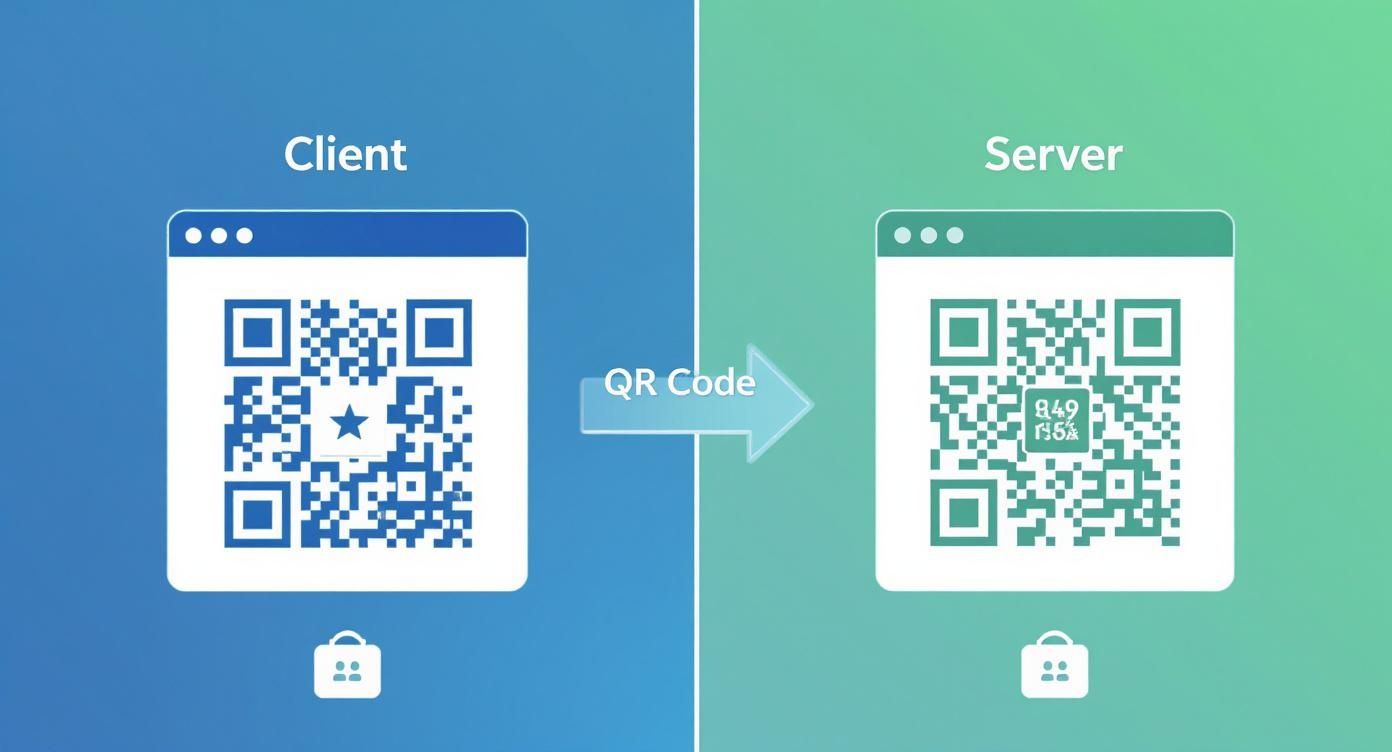
As you can see, the server-side approach has a few more steps, but it gives you much tighter control over security and logging every transaction properly.
Simplifying Confirmations with BlockBee
Let's be honest: directly monitoring multiple blockchains, counting confirmations, and building a reliable callback system is a massive headache. This is where a payment gateway like BlockBee saves the day. It handles all the complex, behind-the-scenes blockchain work so you can stay focused on your actual business.
BlockBee boils it all down to a simple API. When you need to get paid, you make one API call to BlockBee to create a unique address for that specific order. From that point on, BlockBee does the watching for you.
As soon as a payment hits that address, BlockBee’s system instantly fires off a detailed notification (an IPN) to your callback URL. It tells you everything you need to know about the payment status. This completely eliminates the need to run your own nodes, build a polling mechanism, or worry about blockchain reorgs.
Advanced Security for Your Payment System
When you're ready to move your qr code crypto payment system from a test environment into the real world, your focus has to shift dramatically toward security and user experience. It's no longer a simple proof-of-concept. Now, you’re building a resilient, trustworthy system to protect both your business and your customers.
This means going beyond the basics to implement security practices that tackle the unique challenges of blockchain transactions. It’s also the point where you can start exploring more powerful uses for this tech, like streamlining mass payouts for affiliate programs or even employee payroll.
Hardening Your Dynamic QR Code Strategy
The security of your entire payment flow often comes down to how you handle your dynamic QR codes. While they are a huge step up from static codes, you can take a few more steps to really lock them down. A stale, unscanned QR code left sitting on a checkout page is a loose end you don't want.
The most critical best practice here is setting short expiry times on every dynamic code you generate. For a standard e-commerce checkout, 10-15 minutes is plenty of time for a user to act. This one simple move solves several potential headaches:
- Price Volatility: It stops a customer from paying an old, outdated price long after the market has moved.
- Abandoned Carts: It keeps your system clean by automatically invalidating old, unused payment requests.
- Stale Requests: It guarantees that every payment attempt is fresh and tied to a current order.
Once a code expires, your user interface should make it obvious and provide a simple "Refresh" button. This generates a new QR code with an updated rate and a fresh timer, keeping the checkout process smooth and transparent.
Key Security Insight: Think of it like the principle of least privilege, but for time. A QR code should only exist for as long as it absolutely needs to. Short expiry times are your first line of defense against stale data and potential misuse.
Preventing Address Reuse for Enhanced Privacy
Here’s a big one: avoid reusing addresses. Sending every single incoming payment to the same wallet address is a privacy disaster. Since the blockchain is public, anyone can plug that address into a block explorer and see every payment you’ve ever received—the amounts, the timing, everything.
For a business, that's just not acceptable. It lays your entire transaction history bare, handing competitors valuable intel on your sales volume and cash flow. For your customers, it ties their personal transaction to a known business, compromising their own financial privacy.
The proper way to handle this is with a hierarchical deterministic (HD) wallet on your backend. HD wallets let you generate a practically infinite number of unique addresses from a single master seed. For every new order, your system should generate a completely new address. This isolates each payment, making it impossible to link them together on-chain. This is something services like BlockBee handle for you automatically with every API call.
Securing Your Callback Endpoints
Your callback endpoint, or webhook, is the digital doorway into your backend system. It needs to be guarded like a fortress. When a payment gateway sends a notification that an order has been paid, you must be absolutely certain that signal is legitimate and not a fake request from an attacker trying to trick your system.
Securing this endpoint requires a multi-layered approach.
- Use a Secret Key: Your payment provider should let you set a secret key. They'll use this key to create a unique digital signature for every callback they send.
- Verify the Signature: When your endpoint gets a callback, the very first thing it must do is regenerate that signature using the same secret key and the data from the request. If your signature matches the one sent in the header, you know the request is authentic.
- Whitelist IP Addresses: For an extra layer of security, configure your firewall to only accept requests to your callback URL from your payment provider’s specific, known IP addresses.
Leaving this endpoint unsecured is like leaving the back door to your warehouse wide open. It’s a massive vulnerability that attackers will actively look for. Of course, protecting your best practices for private key security is just as crucial for the integrity of your entire operation.
To help you get this right, here’s a quick checklist of the essential security measures we’ve discussed.
Essential Security Checklist for Crypto QR Payments
| Security Measure | Why It's Important | Implementation Tip |
|---|---|---|
| Short Expiry Times | Prevents payments at outdated crypto prices and misuse of stale QR codes. | Set a 10-15 minute timer on dynamic QR codes for typical checkouts. Refresh expired codes automatically. |
| No Address Reuse | Protects business and customer privacy by isolating transactions on the blockchain. | Use a hierarchical deterministic (HD) wallet to generate a new, unique address for every single order. |
| Callback Signature Verification | Confirms that payment notifications are authentic and not spoofed by an attacker. | Always validate the signature in the callback header using your secret key before processing the order. |
| IP Whitelisting | Adds a network-level defense, blocking any callback requests from unauthorized sources. | Configure your server or firewall to only accept traffic to your webhook URL from your provider's IPs. |
| Secure Private Keys | Your private keys control all your funds; a compromise is a catastrophic failure. | Store keys offline in a secure environment (hardware wallet) and never expose them in your server-side code. |
Running through this checklist for any new implementation is a non-negotiable step toward building a system that’s not just functional, but genuinely secure.
In 2025, the combination of QR codes and cryptocurrency has become a major driver of global adoption. This growth is particularly explosive in markets like the United States, which saw a 50% increase in crypto activity from January to July 2025 alone. This surge, fueled by the sheer convenience of QR payments, has cemented its place as the largest crypto market in the world. Stablecoins are playing a massive role, now accounting for 30% of all on-chain transaction volume. You can dive deeper into these trends in the 2025 crypto adoption and stablecoin usage report by TRM Labs.
Testing Your Integration with Testnets
https://www.youtube.com/embed/phWHdo2Hi4w
Before you let a single real dollar, or satoshi, move through your new system, you have to test it. I can't stress this enough. Pushing a faulty payment integration live is a fast track to lost funds and angry customers. This is exactly why cryptocurrency testnets are a developer's best friend. They're essentially parallel blockchains that act just like the real thing but use worthless coins, letting you safely vet every part of your qr code crypto flow.
Think of a testnet as a full-scale dress rehearsal for your payment system. For Bitcoin, you'll be using the official testnet. If you're working with Ethereum, a popular and reliable choice is the Sepolia testnet. These networks operate just like their mainnet counterparts—they have real miners, blocks, and transaction confirmations. The only difference? The currency has zero market value, so you can experiment without any financial risk.
Getting Your Hands on Testnet Coins
To start simulating transactions, you'll need some testnet currency. You don't buy it; you get it for free from services called faucets. A faucet is just a simple website where you plug in your testnet wallet address, and it sends you a small stash of test coins to get you going.
- Bitcoin Faucets: A quick search for "Bitcoin testnet faucet" will give you plenty of options that hand out tBTC.
- Ethereum Faucets: Look for a "Sepolia faucet," and you'll be able to claim some Sepolia ETH.
Once you’ve got these coins, you can point your backend and wallet software to the right test network. Most crypto libraries and services like BlockBee have a simple toggle or configuration setting to switch between mainnet and testnet, which makes the whole process pretty painless for development.
Your Essential Testing Checklist
With your environment set up and your wallet funded with test coins, it's time to put your integration through its paces. Don't just check for the "happy path"—actively try to break things. The goal here is to find every potential point of failure before your customers do.
Make sure your checklist covers these critical areas:
- QR Code Scannability: Can the QR code be scanned? Test it with multiple wallet apps on both iOS and Android. It should scan instantly and populate the address and amount fields correctly.
- URI Format Correctness: Dig into the data behind the QR code. Is the payment URI (like BIP-21 or EIP-681) perfectly formatted? One wrong character can make the whole thing useless.
- Payment Amount and Expiry: If you're using dynamic codes, confirm that the exact payment amount is pre-filled in the wallet. Also, make sure the code properly expires after its set time limit.
- Callback Logic: This is a big one. Simulate a successful payment. Does your backend get the webhook notification right away? Does it update the order status in your database correctly?
- Underpayment and Overpayment Scenarios: What happens if a user sends a little less or a little more than required? Your system needs to have clear logic to handle these common edge cases gracefully.
One of the most common issues I see is a payment that gets sent but is never "seen" by the merchant's system. This almost always points to a misconfigured callback URL or a firewall that's blocking the incoming notification from the payment provider. Always double-check your server logs for incoming requests if you run into this—it's the fastest way to diagnose the problem.
By methodically running through this checklist on a testnet, you can launch your qr code crypto payment system with confidence, knowing it’s robust, reliable, and ready for the real world.
Common Questions About Crypto QR Codes
When you start working with crypto QR codes, a few key questions pop up almost immediately. Getting the answers right is the difference between a clunky, error-prone system and a smooth, professional checkout experience. Let's walk through the most common hurdles I see developers and businesses face.
Why Should I Use Dynamic QR Codes Instead of Static Ones?
Think of it this way: a dynamic QR code is tailor-made for a single transaction. It’s not just a wallet address; it's a complete invoice packed into a scannable image. You can embed the exact payment amount and a unique order ID right into the code. This is a game-changer for any real business.
Why? Because it automates everything. The payment amount is pre-filled, eliminating customer errors. Your backend system instantly knows which payment corresponds to which order, making reconciliation a breeze.
A static QR code, on the other hand, is just your wallet address. The customer has to manually type in the amount. This opens the door to underpayments, overpayments, and a huge headache for you trying to figure out who paid for what. For any kind of e-commerce, dynamic is the only way to go.
How Do I Handle Crypto's Price Volatility During Checkout?
Volatility is the elephant in the room with crypto payments. The standard way to tackle this is to lock in the crypto-to-fiat exchange rate for a very short period—usually 10 to 15 minutes—the moment the customer generates the payment QR code.
Your checkout page absolutely needs to show a countdown timer. This creates a sense of urgency and clearly communicates the payment window to the user. If they miss that window, the QR code must expire. Your system should then prompt them to generate a new one with a fresh, updated exchange rate. This is where a payment gateway like BlockBee really shines, as it handles this entire rate-locking and expiration flow for you.
Can a Single QR Code Accept Multiple Cryptocurrencies?
Simply put, no. A QR code generated using standards like BIP-21 (for Bitcoin and its forks) or EIP-681 (for Ethereum-based tokens) is hard-coded for one specific cryptocurrency and one specific address. If a customer tries to send a different coin—say, sending ETH to a BTC address—those funds will be lost forever.
The correct way to accept multiple cryptocurrencies is to let the user choose their preferred coin first. Only after they select BTC, ETH, or USDT, for example, should your system generate the specific QR code for that asset. This ensures the payment goes to the right wallet on the right blockchain.
Are QR Code Payments Safe for My Customers?
For the most part, yes. When a customer uses a trusted, non-custodial wallet app, the process is very secure. Before they ever approve the transaction, their wallet will show them a final confirmation screen displaying the exact destination address and the amount. This gives them a final chance to verify everything looks correct.
The biggest risk out there is a low-tech scam called QR phishing. This is where a scammer physically puts a sticker of their own QR code over a legitimate one. While less of a concern for online checkouts, it's a real threat in physical stores. The best defense is user education: always scan codes from trusted sources and double-check the details in your wallet app before confirming. For merchants, it means keeping your checkout pages secure from any on-page manipulation.
Ready to build a secure, efficient crypto payment system without getting bogged down in the complexity? BlockBee provides all the tools you need, from automated dynamic QR codes and instant payment notifications to handling mass payouts. Get started with BlockBee today!