
A Complete Guide to Coinbase Bank Wire Transfers
When you need to move serious money into or out of your Coinbase account, a bank wire is your best bet. Think of it as the go-to method for transferring significant amounts of US Dollars, Euros, or British Pounds, especially when compared to ACH or debit card purchases. For serious investors and businesses, the higher transfer limits and secure processing make it a no-brainer.
Understanding Coinbase Bank Wire Transfers

Let's be practical. While swiping a debit card is great for grabbing a small amount of crypto on the fly, those instant methods come with frustratingly low daily limits. A Coinbase bank wire is built for a different purpose—it’s the trusted bridge for moving real capital. Depending on your account's verification level, you could be looking at limits in the hundreds of thousands of dollars.
The real advantage? Speed of access. An ACH transfer might take a few days to clear, and even then, your funds could be on hold. Wire transfers are different. Once the money hits your Coinbase account, it’s generally considered cleared and ready to use. In a market that can swing wildly in minutes, having immediate access to your capital is a massive edge.
Key Elements of a Successful Wire
Getting your wire transfer right comes down to one thing: attention to detail. When you initiate a deposit on Coinbase, you'll get a set of wire instructions containing a unique reference code. This code is everything. It’s the single most important detail that tells Coinbase’s bank exactly which account to credit with the funds.
Make sure you have all the pieces of the puzzle from Coinbase before heading to your bank:
- Coinbase's Bank Name: The specific institution where your funds are headed.
- Routing and Account Numbers: The digital address for the destination account.
- Beneficiary Information: This will be Coinbase's official account name.
The number one mistake people make is forgetting or messing up that reference code. If that happens, your money will likely arrive at the bank but will just sit there, unassigned, until you contact support to have them hunt it down manually.
Pro Tip: Before you hit send, triple-check that the name on your bank account is an exact match to the name on your Coinbase account. Even a small difference, like a missing middle initial, can trigger an automatic rejection and send your funds bouncing back.
Personal vs. Business Accounts
The nuts and bolts of sending a wire are pretty much the same whether you have a personal or a business account. The main differences lie in the verification process and the resulting limits. Business accounts go through a much more detailed onboarding process but are rewarded with substantially higher transfer limits—a must for corporate treasuries or merchants.
Whether you're an individual trader or a company, the bank wire is a fundamental tool for managing your fiat on the platform. Understanding these fiat on-ramps is fundamental to effectively interacting with crypto exchanges.
Coinbase Funding Methods At a Glance
To put it all in perspective, here's a quick rundown of how bank wires stack up against other common ways to fund your Coinbase account.
| Transfer Method | Typical Speed | Transaction Limits | Associated Fees | Best For |
|---|---|---|---|---|
| Bank Wire | 1-3 business days | Very High (often $100k+) | Incoming: $10; Outgoing: $25 | Large investments, business funding, speed of access to funds |
| ACH Transfer | 3-5 business days | Lower | Free | Regular, smaller deposits when speed isn't critical |
| Debit Card | Instant | Low | Higher (~3.99%) | Small, quick purchases; immediate trading needs |
| PayPal | Instant | Moderate | Higher (~3.99%) | Convenient, instant purchases and cash-outs |
Choosing the right method really depends on your goal. For a quick, small buy, a debit card is fine. But for moving significant capital efficiently, nothing beats a wire transfer.
Linking Your Bank Account for a Wire Transfer
Before you can even think about sending or receiving a Coinbase bank wire, you need to connect your bank account. This isn't just a box-ticking exercise; it's the foundational step that protects your money and proves you are who you say you are. Getting this right from the get-go will save you a world of headaches later on.
First, you'll head over to the "Payment Methods" section of your Coinbase account. When you go to add a new account, you’ll be presented with a few options. It’s crucial that you select "Wire Transfer" specifically, as the information needed for a wire is distinct from what’s required for a standard ACH transfer.
Coinbase will then ask for your bank's details—the usual suspects like the bank name, your account number, and the routing number. I can't stress this enough: check, double-check, and triple-check every single digit. A simple typo here is the number one reason transfers fail or, far worse, get sent into the void.
Getting Through the Verification Gauntlet
Once your details are in, Coinbase needs to confirm you actually own the account. How they do this can vary a bit depending on where you are and what currency you're dealing with.
For most people in the U.S., the tried-and-true method is micro-deposits. Coinbase will send two tiny, random deposits—we’re talking a few cents—to your bank. Keep an eye on your bank statement, as it can take 1-2 business days for them to show up.
When you see them, you’ll just:
- Pop back into your Coinbase account.
- Go to the "Payment Methods" area again.
- Enter the two exact amounts to finalize the connection.
This simple back-and-forth confirms you have access to the account's transaction history, which is good enough proof of ownership for them.
Why You Might Need to Submit Documents
Sometimes, especially if you're aiming for higher transfer limits or are an international user, you'll run into Know Your Customer (KYC) requirements. This is standard procedure across the financial world to prevent money laundering.
You might be asked to upload a recent bank statement. The goal is just to prove the account is active and registered under your name. A common snag here is submitting a poorly scanned document. If you need to rotate scanned bank statements, make sure you do it so the document is upright and perfectly legible. An unreadable file is an easy excuse for a delay.
Here’s a piece of advice I give everyone: the name on your Coinbase profile has to be an identical match to the name on your bank account. A small difference, like "Jim" on one and "James" on the other, or a missing middle initial, is often enough to get your application rejected.
Common Mistakes to Sidestep
Patience is a virtue here. The biggest mistake I see people make is rushing through the setup process and fat-fingering their account number. Slow down, take a breath, and verify every piece of information before you hit submit. A few extra minutes now can save you days of waiting and frustration.
Another classic error is trying to link a business bank account to a personal Coinbase profile (or the other way around). These must match. If you're operating a company, you need a Coinbase Business account to connect with your corporate bank. Mixing them up is a guaranteed dead end for the verification process.
Nail this initial setup, and every future Coinbase bank wire will be a much smoother ride.
How to Deposit Funds to Coinbase with a Bank Wire
Alright, so you’ve linked your bank account and are ready to wire some cash over to Coinbase. This part is pretty straightforward, but you absolutely have to get the details right. Think of it as a playbook for making sure your money lands in your account quickly and without any headaches.
First things first, log in to your Coinbase account. You'll want to find your USD balance (or whichever currency you're using) and look for the "Add cash" or "Deposit" button. The key here is to specifically select "Wire transfer" as your deposit method. Choosing anything else will send you down the wrong path.
Finding Your Unique Wire Instructions
Once you select "Wire transfer," Coinbase will generate a unique set of instructions just for you. This isn't generic bank info; it's the specific destination address for your funds.
Pay close attention to what's on this screen. You'll need to copy every detail perfectly:
- Bank Name: The name of the bank Coinbase uses to receive funds.
- Routing Number: The nine-digit code that identifies their bank.
- Account Number: The specific account number for the deposit.
- Reference Code: This is the most important piece of the puzzle—a unique string of letters and numbers.
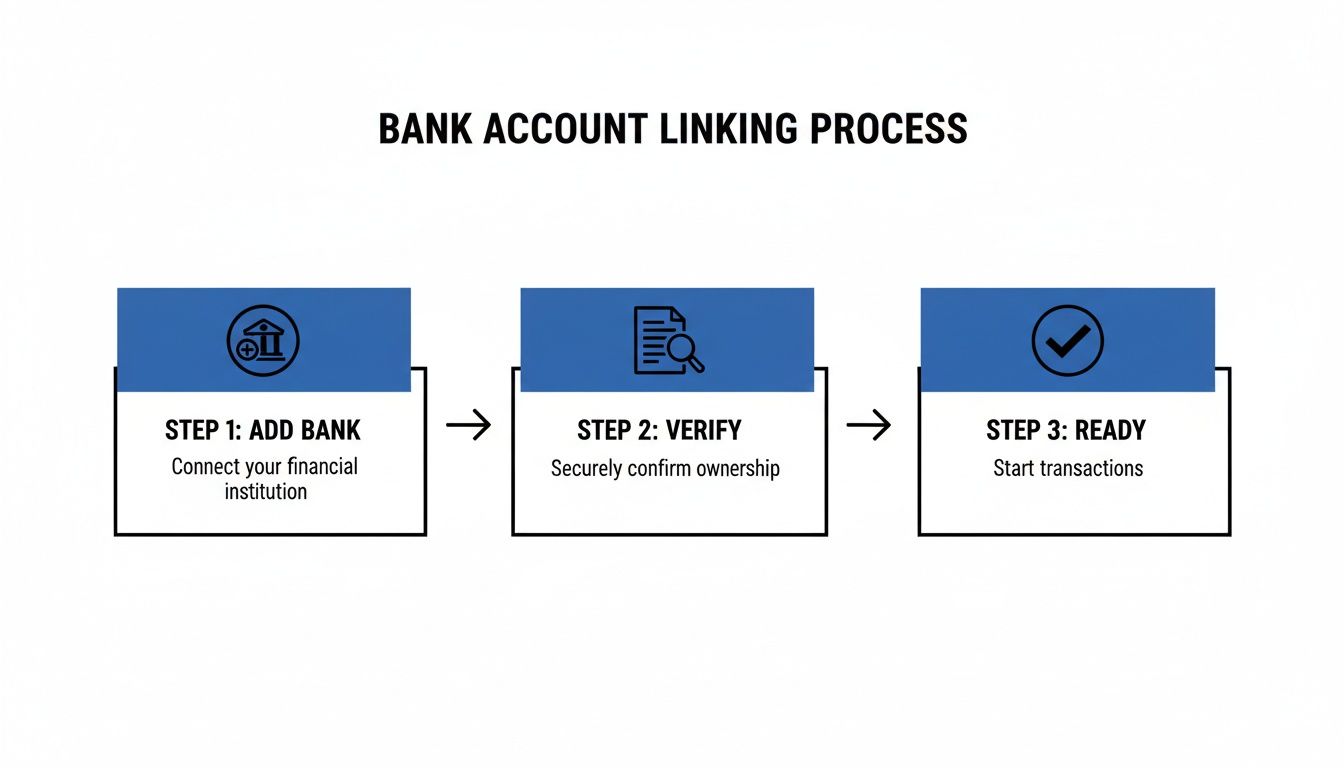
This is the standard flow: you add your bank, get it verified, and then you're clear to start moving money.
Don't Forget the Reference Code
I can't stress this enough: that reference code is everything. It's the only thing that tells Coinbase, "Hey, this wire transfer belongs to this specific person." Without it, your money arrives at their bank, but they have no clue who sent it or where to put it.
When you're setting up the wire on your bank's website, you’ll see a field labeled "Memo," "Reference," "Message," or "Notes to Recipient." This is where that code goes. Paste it in there and don't add anything else—no notes, no descriptions, just the code.
Expert Tip: Getting the reference code wrong or leaving it out is the single biggest reason for wire deposit delays. Your money will eventually get sorted out, but you'll have to contact support and wait for them to track it down manually. That can turn a one-day transfer into a week-long ordeal.
Kicking Off the Wire from Your Bank
Now, head over to your online banking portal. Find the option for sending a wire transfer—make sure it's not an ACH transfer or a simple bill payment, as those are different systems.
You'll meticulously enter the details you copied from Coinbase: the bank name, routing, and account number. And, of course, you'll paste that critical reference code into the right field.
You'll also need to specify the exact dollar amount. Keep in mind that Coinbase charges a $10 fee for incoming USD wires. Your own bank will also hit you with an outgoing wire fee, which is typically in the $25 to $35 range.
What to Expect After You Hit Send
Once the wire is on its way, you just have to wait a bit. For domestic USD wires, the funds usually show up in your Coinbase account within one to three business days. Bank holidays and weekends don't count, so plan accordingly if you're in a hurry.
Coinbase is great about keeping you updated. You’ll get an email and a notification in the app as soon as the funds are credited. This speed is crucial for traders who need to act fast on market changes.
This efficiency is a big part of why Coinbase is such a powerhouse. The Coinbase Exchange regularly sees massive trading volumes—recently hitting $2,941,765,661.21 in a 24-hour period. Its perfect 10/10 Trust Score on CoinGecko speaks to its reliability and security, setting the standard for the entire industry.
Cashing Out: Getting Your Money From Coinbase to Your Bank
When it's time to take profits or move your crypto back into traditional currency, you want the process to be straightforward. For moving larger sums, a Coinbase bank wire is one of the most reliable ways to get funds from your Coinbase account directly into your bank.
It all starts inside your Coinbase account. The first thing you'll need to do is sell your cryptocurrency for your local currency, whether that's USD, EUR, or GBP. This action turns your crypto into a cash balance right inside your Coinbase portfolio, ready for withdrawal.
With a cash balance sitting in your account, head over to your portfolio and click on the currency you want to move. You'll spot a "Cash out" or "Withdraw" button. Clicking that takes you to the next step: telling Coinbase where to send the money.
The Withdrawal Process in Action
Coinbase keeps the user interface pretty clean and simple. Once you've selected your linked bank account, you just have to type in the exact amount you want to pull out. Before you hit that final confirmation button, Coinbase gives you a clear breakdown of the transaction, which includes any fees.
Keep in mind, for an outgoing USD wire, Coinbase typically charges a $25 fee. It's a flat fee, which is great for large amounts, but it's something to consider on smaller withdrawals where it can take a bigger bite out of your total.
Let's look at a quick example. Say you just sold $50,000 worth of Bitcoin.
- You’d go to your USD wallet on Coinbase.
- Hit the "Cash out" option.
- Pick your bank account (make sure it's the one you've verified for wires).
- Enter $50,000 as the amount.
- A confirmation screen will pop up, showing the $25 wire fee. This means your bank will receive $49,975.
Once you give it the final okay, Coinbase gets the wire transfer started, and you'll get an email letting you know the process is underway.
What to Expect: Limits and Timelines
How much you can withdraw is directly linked to your account's verification level. If your account is fully verified, you’ll have much higher daily and monthly withdrawal limits. If you're planning on moving a significant amount, it's always smart to double-check your limits in your account settings first. No one likes last-minute surprises.
Pro Tip: Remember that wire transfers operate on business days. If you start a wire on a Friday afternoon, it likely won't even get processed by the banks until Monday morning. Always factor in weekends and public holidays when you're estimating arrival times.
A domestic USD wire usually lands in your bank account within 1-3 business days. International transfers, like SEPA for Euros or Faster Payments in the UK, can sometimes be even quicker, occasionally arriving the same day. Still, it's best practice to plan for the full timeframe. For a deeper dive into moving funds out of crypto, our guide on how to transfer crypto to a bank account is a great resource.
For businesses, timing these fiat conversions is a strategic move. Having access to good historical market data is a game-changer here. Payment processors, for example, can analyze market trends to decide the best time to convert crypto to fiat, helping to sidestep volatility. Using detailed trade data from sources that have tracked Coinbase since 2014, businesses can backtest their strategies and make smarter decisions. To see what that looks like, check out Coinbase's deep historical market data on Amberdata.
By getting a handle on the fees, limits, and realistic timelines for a Coinbase bank wire, you can plan your withdrawals without the guesswork and make the whole process a lot smoother.
Troubleshooting Common Bank Wire Problems

Even when you follow all the steps perfectly, a Coinbase bank wire can sometimes hit a snag. It's a stressful feeling, especially when you're watching your bank account for a large sum of money to land.
The good news? Most of these issues are surprisingly common and, more importantly, fixable. Let's walk through how to handle the most frequent headaches, from mystifying delays to outright rejections, so you can turn a moment of panic into a minor, manageable hiccup.
My Wire Transfer Is Delayed What Should I Do
This is the most common call for help: the money has left your bank, but your Coinbase balance is still zero. Before you start to worry, take a breath and run through a quick mental checklist.
First, remember that banks operate on their own clock. If you sent the wire late on a Friday, over the weekend, or during a holiday, the 1-3 business day countdown hasn't even started yet. You have to give it the full window before sounding the alarm.
Once that time has officially passed, it’s time to play detective. Pull up the wire receipt from your online banking and compare it, character-for-character, against the instructions from Coinbase.
- Are the routing and account numbers exactly right?
- Does the beneficiary name match what Coinbase gave you perfectly?
- And the big one: did you include that unique reference code?
Nine times out of ten, that last point is where things go sideways.
The Dreaded Missing Reference Code
If there's a single mistake that causes the most delays, it's forgetting to include the unique reference code. Think of it this way: that code is the only thing telling Coinbase's banking partner that the incoming money belongs to you. Without it, your funds arrive at their bank but are essentially anonymous.
Don't panic if you realize you forgot it. Your money isn't lost, it's just sitting in a queue waiting to be claimed.
You'll need to contact Coinbase support right away and be ready to provide them with the evidence they need to find your deposit:
- The exact wire transfer amount
- The date you sent it
- The name of your bank
- Your bank's transaction ID or confirmation number for the wire
With this info, the support team can manually track down your funds and credit your account. It's an avoidable delay, but it's a completely solvable problem. If you find yourself in this situation, it can be helpful to read up on why a Coinbase transaction is pending, as it offers more insight into how their system processes transactions.
Key Takeaway: Treat the reference code like a second account number. Before you ever hit "send," double-check that the code is in the "memo" or "reference" field and that it's the only thing in that field.
Dealing with Rejected or Canceled Wires
A rejected wire is a different beast entirely. Instead of being delayed, the funds are actively bounced back to your bank account. This almost always happens for a few very specific, and thankfully preventable, reasons.
The most common culprit by far is a name mismatch. The name on your bank account must be an identical, letter-for-letter match to the name on your Coinbase account. A wire from "James Smith" will be kicked back if the Coinbase account is registered to "Jim Smith." No exceptions.
A few other common triggers for rejection include:
- Exceeding Transfer Limits: Make sure the amount you're sending falls within your established daily or monthly funding limits on Coinbase.
- Incorrect Bank Type: Sending from a business bank account to a personal Coinbase account (or the other way around) is a guaranteed rejection.
When a wire is rejected, the money usually reappears in your bank account within a few business days, often minus any fees your bank charged for the trouble. The best thing to do is figure out what went wrong—the name mismatch, the wrong account type—fix the underlying issue, and then simply start a new transfer with the corrected details.
Advanced Payment Solutions for Merchants
For an individual trader, using a Coinbase bank wire to move funds in and out of the market works just fine. It's a straightforward tool for a simple job.
But what if you're running a business? If you're managing an e-commerce store or a B2B service that deals with crypto transactions every day, that manual wire process quickly becomes a huge headache. Relying on individual wires for every payout or settlement creates a serious operational bottleneck. It's slow, tedious, and opens the door to costly human errors.
Merchants simply need a more automated, reliable financial workflow. This is exactly where dedicated crypto payment processors like BlockBee step in. These platforms are built from the ground up to handle the A-to-Z of crypto payments, taking the manual grunt work completely off your plate.
Automating Crypto to Fiat Conversions
One of the biggest hurdles for any business accepting crypto is dealing with price volatility. The value of Bitcoin or Ethereum can swing wildly in the time between a customer's payment and you cashing out to fiat. Trying to manually time those conversions is a recipe for stress and lost revenue.
A good payment gateway automates this entire headache away. You can set it up to instantly convert any incoming crypto payment into your preferred fiat currency, whether that's USD, EUR, or something else. This all happens behind the scenes, protecting your business from market dumps and making your revenue stream stable and predictable.
Imagine a customer pays for an order with Bitcoin. The payment processor instantly receives the BTC, converts it to USD at the current market rate, and deposits the cash right into your connected account. No more chart-watching or manual trading required.
Comparing Fiat Conversions with Stablecoin Settlements
While converting directly to fiat is a solid option, many businesses are finding an even better way: settling transactions in stablecoins like USDC or USDT. This approach has some massive advantages over traditional banking rails.
Here’s where it really shines:
- Speed: Stablecoin transactions on a blockchain can settle in minutes, sometimes even seconds. That's a world away from waiting one to three days for a bank wire to clear.
- Lower Fees: The cost to move stablecoins is often a fraction of the combined exchange and wire fees. For businesses with high transaction volumes, the savings can be huge.
- Global Access: Stablecoins are on 24/7. There are no banking hours, no holidays, and no international transfer delays to worry about.
Key Insight: For merchants, the goal isn't just to accept crypto—it's to build an efficient financial machine on the backend. Settling in stablecoins often proves faster, cheaper, and far more flexible than constantly converting back to fiat, especially if you're doing business across borders.
This isn't a niche trend; it's a massive shift in how money moves. The stablecoin market settled an incredible $10.8 trillion in 2023. Even when you filter out the noise, organic transaction volume is growing at 17% year-over-year.
The cost savings are undeniable. A remittance using stablecoins can cost as little as 0.5%, while the global average for a traditional bank transfer is 6.35%. For any business handling crypto, this explosive growth points to a huge and expanding market opportunity. You can read more about this in Coinbase's report on the new payments landscape.
Platforms like BlockBee give merchants the tools to build these modern workflows. By integrating a non-custodial payment processor, you get the automation you need to scale your business while keeping full control over your funds. It allows you to offer a seamless crypto checkout for your customers and manage your revenue with a system built for the digital age—moving you far beyond the limits of a simple Coinbase bank wire.
Your Top Questions About Coinbase Wires, Answered
When you're moving money, especially larger amounts, it's natural to have a few questions. Let's clear up some of the most common things people ask about sending a wire to or from Coinbase.
How Long Does a Coinbase Bank Wire Take?
For US customers using a standard USD wire, you can generally expect the funds to land within 1-3 business days. This isn't a Coinbase-specific delay; it's just the time it takes for the traditional banking system to do its thing.
If you're in Europe or the UK, things often move much faster. SEPA transfers (for EUR) and Faster Payments (for GBP) can often show up the very same day. Just remember that weekends and bank holidays will always hit the pause button on any transfer.
What Happens If I Forget the Reference Code on a Deposit?
This is probably the most common hiccup people run into, and while it's fixable, it's a real headache. That reference code is how Coinbase knows the incoming money belongs to you. Without it, your deposit sits in a kind of financial limbo at their bank.
The result? A major delay. The funds might even get bounced back to your bank account after a while. If you realize you've made this mistake, get in touch with Coinbase support right away. You'll need to give them every detail you have—the exact amount, the date, and the wire confirmation from your bank—so they can hunt down your money and credit it manually.
Pro Tip: Always, always double-check that you've put the reference code in the "memo," "reference," or "notes to recipient" field before you hit send. It's the single most important step for a smooth deposit.
Are There Fees for Coinbase Wires?
Yes, you'll need to account for a couple of fees. For USD wires, Coinbase itself charges $10 for an incoming wire and $25 for an outgoing one.
Keep in mind that's just on their end. Your own bank is almost guaranteed to charge its own fee for sending or receiving a wire, which can be anywhere from $25 to $50. It’s a good idea to check with them beforehand so there are no surprises.
For SEPA and Faster Payments, Coinbase doesn't typically add a fee, but it's still smart to confirm that your bank doesn't have any of its own charges.
Why Was My Wire Canceled or Rejected?
It's frustrating when a transfer gets rejected, but there's almost always a straightforward reason. The number one culprit is a name mismatch. The name on your bank account must be an exact, character-for-character match with the verified legal name on your Coinbase account. No nicknames, no abbreviations.
Other common reasons include trying to send more than your daily limit allows or simply mistyping the bank details. Check every digit carefully. If you've reviewed everything and it still fails, it's time to contact both your bank and Coinbase support to figure out where the disconnect is.
At BlockBee, we know that manual wires just don't cut it for a growing business. Our automated, non-custodial crypto payment gateway is built for merchants who need speed and scale. We offer instant conversions, mass payout tools, and simple e-commerce plugins to create a financial workflow that's truly built for the future. https://blockbee.io